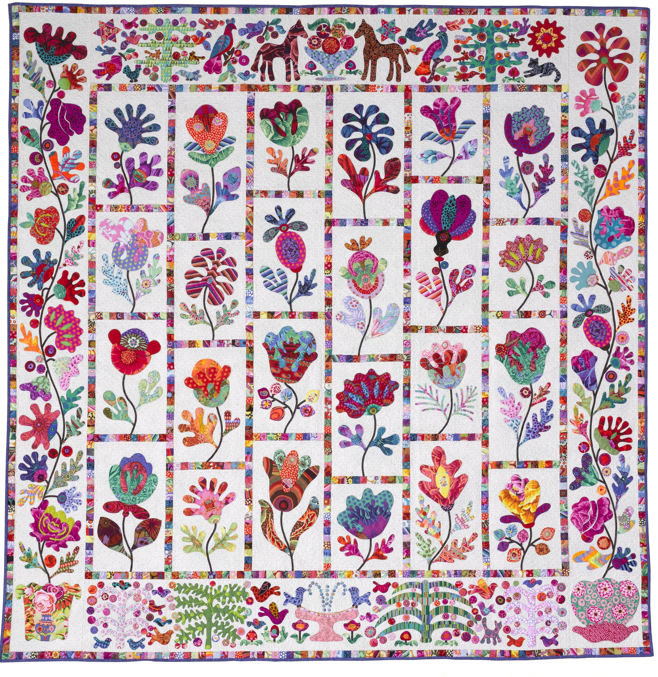
Flower Garden by Kim McLean will be my applique' project for 2012. Kim has such wonderful patterns they are so colorful and the pieces are usually large and not that difficult to do.

I am going to use the freezer paper and starch method for this quilt because the pieces are so large.
I use Reynolds freezer paper and lots of it.

The first thing I do when getting a new roll of freezer paper is cut it into pieces about the size of my applique' pressing sheet and iron them because it's all curled up when you first cut it off the roll. Wonder where that chocolate came from?

You can see how the pressing sheet is wrinkled - the shrinking freezer paper caused the wrinkles. Once it is ironed it is nice and flat stored in a plastic bag and ready to use.


Sometime I just make the shapes for one block at a time but for this quilt I made all the templets for all the blocks because each block only has a few pieces.

These are all the tools I use when I prepare my applique pieces.
As you can see they are well used.
This is the second little iron for me I keep pushing too hard
and breaking the handles.

Here are some shapes ironed to the fabric, trimmed and ready to be turned. Using the little brush put starch on just the seam allowance you are turning under. Turn the seam with your little iron and keep the iron on the seam until it is completely dry. Do a little at a time and don't use too much starch because you will soften the edge of the paper templet.

After the edges are all turned it's time to attach the piece to the background fabric. Remove the freezer paper and place dots of Roxaines glue on the background instead of the applique' piece. Just use a tiny dot. You can tell if you are using too much because if you do the glue will bleed through and your background fabric will stick to your pattern. Once again I use the light box so I can see where to place the pieces.

If the applique' piece is big and floppy I place it on the background first
and then raise parts to place the glue.


My first fifteen blocks prepped and ready to stitch. The pieces don't move around and I can put a block in a little bag and carry it with me so there is always something to stitch while waiting.
I fiddled with this post all last week and I hope it is clear enough to understand a little about how I prepare my blocks for stitching.
If you are really interested in this method you need to visit Erin Russek's blog
One Piece at A Time. She has an excellent blog with pictures and videos. She is also starting a new applique BOM "Mimi's Bloomers" which looks interesting.
Happy Stitching,
Nancy
Thank you for joining Just Us Quilters.
ReplyDeleteWould you kindly add the JUQ button to your blog-a requirement for the listing. Thanks! Grab the HTML now.
Your applique' is beautiful. I really like the Flower Garden pattern, but I bought Stars and Sprigs. All of Kim McLean's patterns are great though. Your blocks are sure looking great!
ReplyDeleteI don't pre-shrink freezer paper but think I should. I was afraid it might take too much of the wax off. I like the idea of using an applique press sheet to do it. I have one.
ReplyDeleteI am doing lollypop trees as a block of the month at my store. I love her patterns. I am also using this method. It is the first time I have tried it so far I like it
ReplyDeleteI'm a freezer paper freak also but thanks for the tip of pre ironing the paper. Have enjoyed dropping in to your blog, wonderful coffee reading. Cheers Glenda Down Under www.patchworkdrems.com.au
ReplyDeleteJust read your tutorial again. I am going to try your method of freezer paper and starch. I like the idea of having everything ready to stitch. Thanks for sharing!
ReplyDeleteGreat tutorial! Thankyou
ReplyDeleteVery helpful!! Thinking of doing this as a group project, learning needle turn method next month, see how we all get on! !!
ReplyDelete